How to Replace Kubota SVL75 Tracks Efficiently?
Replacing Kubota SVL75 tracks can be a daunting task. However, with the right approach, it becomes manageable. The Kubota SVL75 is a versatile machine used in various applications. Track replacement is crucial for maintaining performance and safety.
Many operators often overlook the signs of wear on their Kubota SVL75 tracks. This can lead to unnecessary downtime and costly repairs. Regular inspections are essential. When the tracks show signs of damage, prompt action is needed. Some users may hesitate due to a lack of confidence or understanding of the process. This article aims to simplify that process.
Understanding how to replace Kubota SVL75 tracks is valuable. It's not only about efficiency but also about extending the life of the machine. Each step in the process requires attention to detail. Mistakes can happen, and that's okay; they offer lessons. Emphasizing the importance of thoroughness can prevent future issues. Let's delve into the steps needed for an efficient track replacement.
Understanding Kubota SVL75 Tracks and Their Importance
Understanding the tracks of a compact track loader is vital for optimal performance. The tracks provide traction and stability on uneven terrain. They help distribute the machine's weight, reducing ground pressure. This feature minimizes damage to sensitive surfaces. The right tracks make a significant difference in operating efficiency.
When maintaining these tracks, attention to detail is crucial. Check for wear, cracks, or debris regularly. Neglecting any of these signs can lead to costly repairs. Inspect the tension of the tracks periodically. Misaligned or loose tracks can cause uneven wear. This may result in premature failure, which is something operators often overlook.
Proper maintenance and timely replacement boost productivity. Regular cleaning prevents mud buildup. This is often ignored, leading to performance issues. Using appropriate tools for replacement is essential. It can be a challenging task. Mistakes can occur, and the risk of damaging components increases. A mindful approach can mitigate these risks.
Track Usage and Replacement Frequency for Kubota SVL75
Steps to Safely Remove the Old Tracks
When dealing with track replacements, safety comes first. Removing old tracks from a compact track loader requires careful planning. Before starting, it’s crucial to assess the condition of the tracks. According to a recent industry report, about 30% of track failures come from improper maintenance and installation. Identifying wear patterns can help in executing the removal safely.
Begin by parking the machine on a level surface, ensuring that it is stable. This step reduces the risk of accidents. Release any tension on the tracks. Hydraulic systems might store energy that can cause sudden movement. Ensure all hydraulic systems are depressurized. Remember, ignoring this can lead to injuries.
Once that’s done, use appropriate tools to unbolt and separate the track tensioner. A recent survey indicated that 25% of workers have reported injuries due to improper tool selection. It's essential to choose tools that fit well for the task. Carefully remove the old tracks, checking for any debris. This debris can cause issues in future installations. Ensure to follow manufacturer guidelines strictly during this process. Safety is paramount, and each step should be taken with intent and caution.
Installing the New Tracks: Step-by-Step Guide
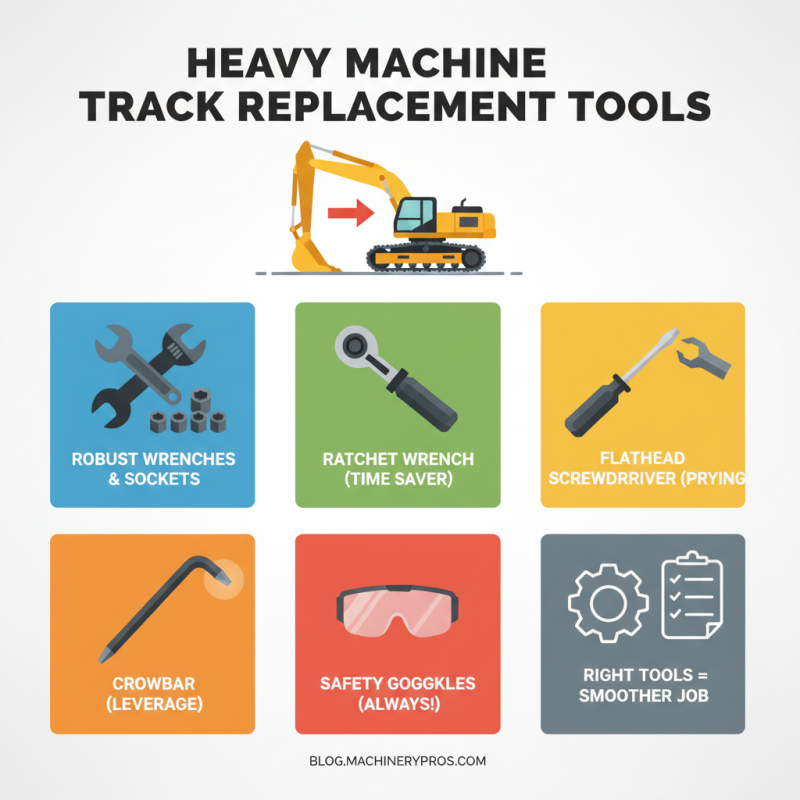
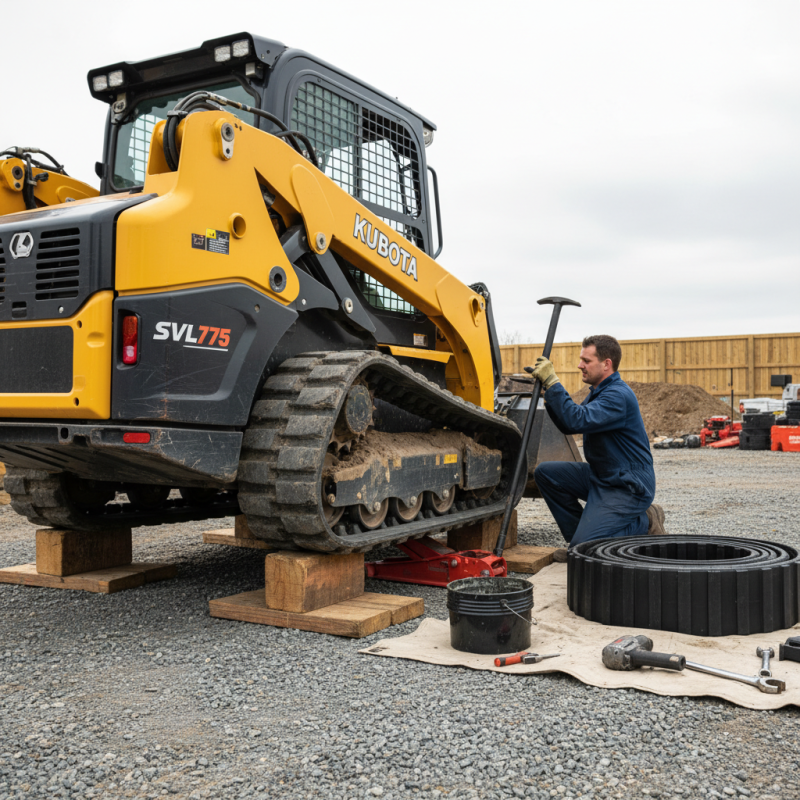
Replacing tracks on your equipment can be tricky. However, following a clear, step-by-step process can make this task more manageable. Start by gathering essential tools. You will need a ratchet, a socket set, and possibly a hydraulic jack. Safety gear is also important. Gloves and goggles protect you from debris and sharp edges.
Begin by lifting the machine safely. Use the jack to elevate it. Always ensure it's stable before proceeding. Once elevated, locate the tensioners on the old tracks. Loosen them carefully. Sometimes, rust can make this difficult. It might take some extra force or penetrating oil to assist.
Next, remove the old tracks by sliding them off the sprockets. This part can be frustrating if the tracks are stuck. Patience is key here. Inspect the undercarriage for wear and tear. After cleaning, position the new tracks carefully. Align them with the sprockets. Tightening the tensioners should be done slowly to avoid over-tightening. Test the movement after installation. Sometimes adjustments are necessary if you hear any unusual sounds. Attention to detail at this stage is vital.
Final Checks and Maintenance Tips After Replacement
After replacing the tracks of a compact track loader, inspecting your work becomes crucial. Small errors can lead to significant issues down the line. Begin by checking the track tension.
Too loose means a lack of grip; too tight can increase wear. Aim for a tension that allows a small deflection when applying pressure. Reports suggest that improper tension can reduce track life by up to 30%.
Next, examine the track alignment. Misalignment can cause uneven wear. Use a straight edge to verify alignment over the idler and sprocket. If you notice a discrepancy, corrections should be made immediately to prevent further damage.
Maintain a regular alignment check to extend track lifespan.
Additionally, consider lubricating critical components. For example, pin and bushings should be well-greased. Neglecting lubrication can lead to increased operating temperatures. Over time, this wear can decrease equipment efficiency.
Implementing a routine inspection schedule could mitigate these risks. Regular maintenance is not just about tracking wear; it’s about ensuring longevity and reliability.